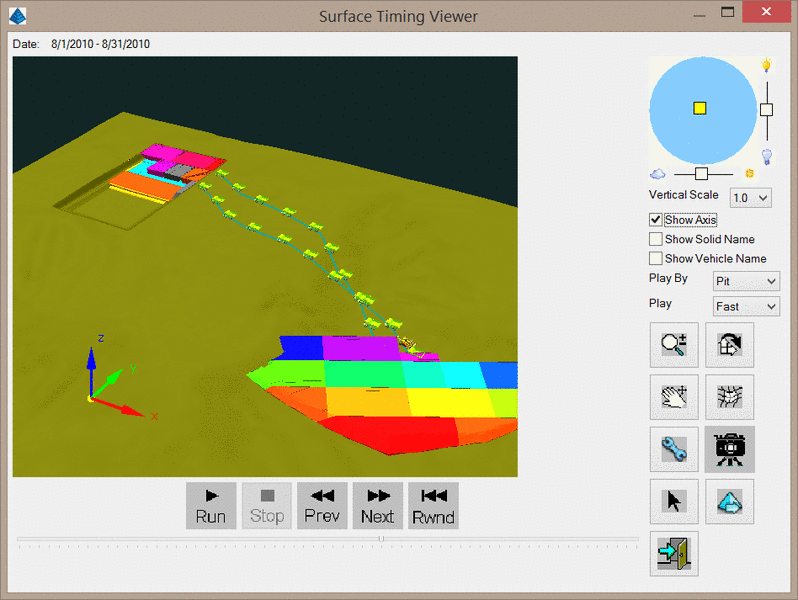
Vertical Scale:This value sets the
vertical exaggeration for the 3D view.
Show Axis: This toggle controls the display of the X-Y-Z Axis icon in the lower left corner of the 3D view.
Show Solid Name: This toggle controls the display of labels above each solid. Names will only be displayed for solids that are being moved during the current time period.
Show Vehicle Name: This toggle controls the display of labels above each piece of equipment.
Play by: This option controls the playback of the 3D View. The Pit option will increment the time period based on when each pit is completely mined out. The Spoil option will increment the time period based on when a spoil polyline is completely filled.
| Control |
Action |
 |
This control represents the position of the sun in plan view. If the yellow square is in the center of the blue circle, the sun is in a zenith. If the yellow square is near the edge of the circle, the sun is near the horizon. To move the yellow square, simply drag it to a new location, or click on the new location. The slider bars on the sides control the intensity and brightness of the display. |
 |
Switch to Dynamic Zoom mode. Click and drag to zoom in and out. |
 |
Switch to Rotation mode. When the cursor is placed near the outer edge of the view, a "Z" cursor is presented that permits rotation around the Z-axis. When the cursor is placed further into the interior of the view, an "X,Y" cursor is presented that permits the tilt angle of the view to be adjusted. |
 |
Switch to Pan mode. Click and drag to pan. |
 |
Toggle shading of 3D Faces and Surfaces. |
 |
Controls coloring and appearance of 3D symbols.
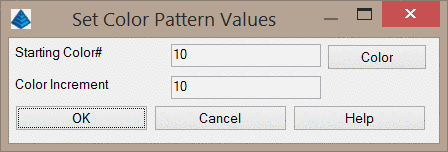
When clicked, the below dialog will appear.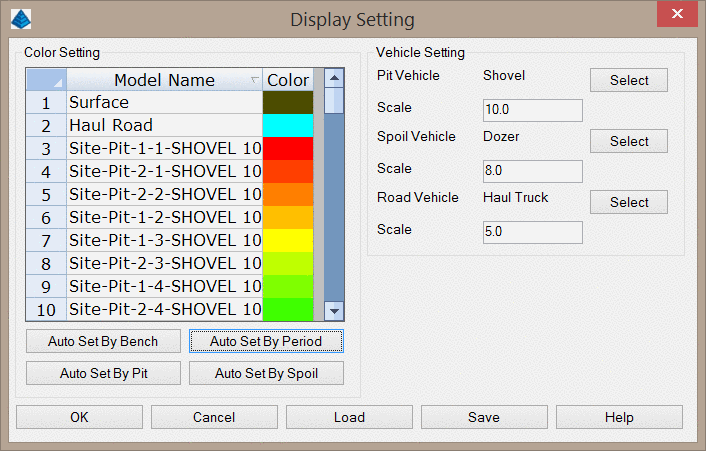 The spreadsheet shown in this dialog lists the name and color of each feature in the 3D window. You can automatically color the solids using one of the Auto Set By... buttons. Auto Set By Bench: This option will color pits and spoil piles by bench number. For example, all instances of bench 1 will be red, all instances of bench 2 will be orange, etc. All of these buttons will display a similar dialog, shown below.The Vehicle Settings allow you to set different 3D models for the pit equipment, the haulage equipment, and the spoil equipment. The Select button will open the 3D Model Library, which includes several pieces of mining equipment. The Scale value controls the size of the model in the 3D view. |
 |
Takes a screenshot of the 3D Viewer. Several different image file formats are supported including bmp, png, jpg, xpm and gif. The image resolution and color depth may be set with this option. |
 |
Switches to Inspection mode. In this mode,
hovering the cursor over a solid will display the name of the
solid. |
 |
Outputs the current time period as a TIN file.
With this command, you can progress through the timeline to key
points in the mine life and export a surface model. |
 |
Exit the command. |
 |
Starts playback of the mine timeline. |
 |
Stops playback. |
 |
Steps back one time period. |
 |
Steps forward one time period. |
 |
Resets the playback to the beginning of the
timeline. |
| The slider bar shows the current position in the
timeline. You can manually click-and-drag the slider bar to
progress through the timeline. |
Pulldown Menu Location: Reserves/Timing
Keyboard Command: tviewer