Microsoftź ActiveSyncź provides support for synchronizing data between a Windows-based desktop computer and Microsoftź Windowsź CE based portable devices. Microsoft ActiveSync 3.7.1 supports Microsoft Windows 98 (including Second Edition), Windows NT Workstation 4.0 SP 6, Microsoft Windows ME, Windows 2000 Professional Edition, and Windows XP.
You should have a serial cable that was included with your mobile device. Attach this cable from your desktop PC to the mobile device.
Before you can install Carlson SurvCE, your desktop PC must have Microsoft ActiveSync installed and running. If you have ActiveSync on your desktop PC, you should see an the ActiveSync icon in your system tray. If you do not see this icon in the tray, choose the Windows Start button, choose Programs and then choose Microsoft ActiveSync. If you do not have ActiveSync installed, insert the Carlson SurvCE CD-ROM and choose Install ActiveSync. You may also choose to download the latest version from Microsoft. After the ActiveSync installation starts, follow the prompts. If you need more assistance to install ActiveSync, visit Microsoft’s web site for the latest install details.
Auto Connection
If the default settings are correct, ActiveSync should automatically connect to the mobile device. When you see a dialog on the mobile device that asks you if you want to connect, press Yes.
Manual Connection
If nothing happens when you connect the cable, check to see if you have the following icon in your system tray ![]() . If you see this icon, right click on it and choose Connection Settings. You should see the following dialog:
. If you see this icon, right click on it and choose Connection Settings. You should see the following dialog:
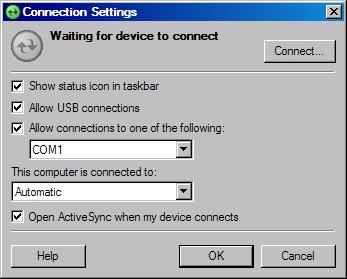
Be sure that you have selected the appropriate COM port or USB options. Assuming that you are using a COM port connection, you will choose the COM port (usually this will be COM1). Click Connect at the top right. You will now see the Get Connected dialog.
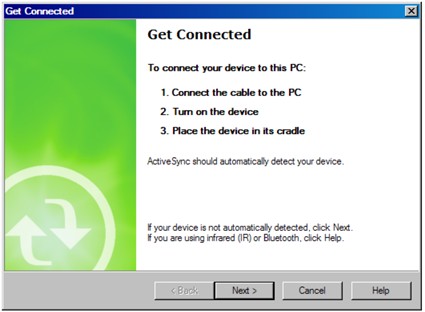
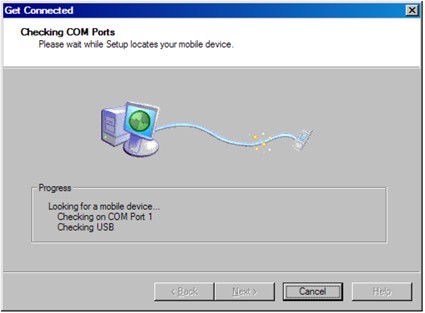
You now need to manually "link" to the remote device. Focus on the mobile device while still observing your PC screen. Observe this above dialog and, with your device properly connected to the PC, be prepared to click the Next button at the bottom. Now look at the mobile device screen for the "PC Link" icon.
First, click Next on the PC. Then immediately double-tap the PC Link icon. (You may have to do the double-tap more than once.) If successful, after you press Next, the following screen will appear and the connection will be made.
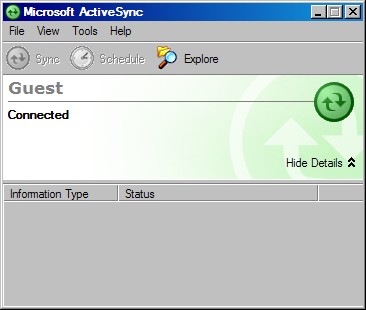
In ActiveSync, you will then see the New Partnership dialog. Click No to setting up a partnership, and click Next. When you see this icon in the system tray ![]() , and it is green with no "x" through it, you are connected. Once you are connected, you should see the following dialog. It should say "Connected":
, and it is green with no "x" through it, you are connected. Once you are connected, you should see the following dialog. It should say "Connected":
Troubleshooting
If you cannot get connected, make sure that no other program is using the COM port. Programs to check for include any Fax/Modem software and other data transfer software. If you see anything you think may be using the COM port, shut it down and retry the connection with ActiveSync.
Enabling COM Port Communication for ActiveSync on Allegro, Panasonic Toughbook 01 and other CE devices
In order for ActiveSync to communicate, it may be necessary to direct the CE device to utilize the COM port as a default. Some may come set default to USB. Go to Start (on Allegro, blue key and Start button), then Settings, then Control Panel, then Communications icon, then PC Connection. Set to Com1 at a high baud rate, such as 57,600 baud. This will download programs and files at a high rate of speed. On the Allegro, use PC Link to connect to PC with ActiveSync. On the Panasonic Toughbook, do Start, Run, and in the Open window, type in autosync –go (autosync then spacebar then minus go). Then do Start, Settings, Control Panel, Communications, do PC Connection, Change Connection to Serial Port @ 115K. Make sure Enable direct connections to the desktop computer is checked.
Note: When using SurvCE’s Data Transfer option, you will need to disable Serial Port Connection (click off Allow Serial Cable). This is done with Connection Settings in ActiveSync. Click back on to use ActiveSync.