Draw Menu: Insert
12.01 North Arrow (NA)
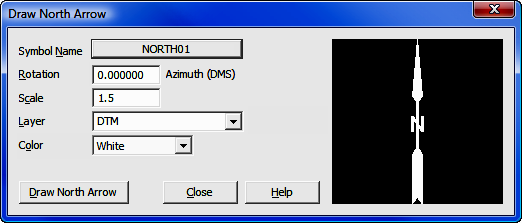
FUNCTION: The North Arrow
routine allows you to insert a North arrow into your drawing at a specified location.
Activate the North Arrow routine by picking from the Draw > Insert menu; by pressing [Alt][D], [I], [N]; or by typing the two-letter command NA at any data entry prompt.
Symbol Name: Click the button to select the North arrow from a graphically displayed array.
Rotation: Enter the angle of rotation as an azimuth in the format shown.
Scale: Enter the scale factor. This is a relative factor; a factor of 2 is twice the size as a factor of 1. You do not have to enter whole numbers. A size of 1 corresponds to an arrow height of 1" when plotted at the scale indicated by the CAD Configuration menu (CM - Section 5.03).
Layer: Click [q] to choose the layer upon which to plot the North arrow, or type in the name of a new layer.
Color: Click [q] to select a color in which the North arrow will be drawn.
[Draw North Arrow]: Clicking this button transfers control to your CAD application which will prompt you to click the location for insertion of the North arrow. After placing the North arrow, focus returns to "Sight" Survey.
|
|
Can't see Filled Arrows? Several North arrows contain fills. If you place a filled North arrow in the drawing but can't see the fills, make sure the Fill attribute is "On." AutoCAD/IntelliCAD users: Enter FILL ON, the issue a REGEN command to refresh the drawing. MicroStation users: Select Settings > View Attributes and select the FILL option. You may apply the option to the open view or all views. |
|
|
Drawing your own North Arrow: "Sight" Survey includes several North arrows. You can edit any existing arrow, or draw your own. If you create your own arrow, start with an existing NorthXX.DWG file and edit it, then be sure to name it as NORTHXX where the XX can be any number. North arrows must be saved as AutoCAD drawings (.DWG). You must also save it in the folder C:\Program Files\Simplicity Sight Survey 2009\Symbols. |