Tools Menu:
Surface
11.06 Calculate Volumes (CV)
FUNCTION: The Calculate Volumes
routine is used to compute the volume between two surface files, or to compute the volume of a stockpile.
Activate the Calculate Volumes routine by picking from the Tools menu; by pressing [Alt][T], [S], [V]; or by typing the two-letter command CV at any data entry prompt.
Volumes Between Surfaces
Compute Volume Between Surfaces: Select this option to calculate the volume between two specified surfaces, then enter or select the surfaces using the Initial Surface and Final Surface fields.
Compute Stockpile Volume: Select this option to calculate a stockpile volume. Stockpiles require only a single surface. This selection makes a change to the initial dialog box. See the Stockpile Volume section below for additional instructions.
|
|
HINT: After each field has been entered, DO NOT press [Enter] to move to the next field. Press [Tab] or click into the field. Pressing [Enter] is the same as clicking [OK]. |
Initial Surface: Enter the initial surface name, or click [Select Surface] to choose a surface file. For instructions on surface selection, see the Select Surface section below.
Final Surface: Enter the final surface name, or click [Select Surface] to choose a surface file. For instructions on surface selection, see the Select Surface section below.
Cut Swell Factor: Enter a swell factor to be applied to the cut volume.
Fill Shrink Factor: Enter a shrink factor to be applied to the fill volume.
[OK]: When you have all the parameters set to your satisfaction, click [OK] to actually compute the volume and generate a report.

[Print Report to Text Output Window]: Select this button to print the report results into the Text Output window, and exit this routine.
[Recalculate with new Surface]: Select this button to discard the results and re-start the routine for another calculation.
[Quit Volume Calculations]: Select this button to discard the results and exit this routine.

Compute Volume Between Surfaces: Select this option to calculate the volume between two specified surfaces, then enter or select the surfaces using the Initial Surface and Final Surface fields. See the Volumes Between Surfaces section above for additional instructions.
Compute Stockpile Volume: Select this option to calculate a stockpile volume. Stockpiles require only a single surface. This selection makes a change to the initial dialog box.
|
|
HINT: After each field has been entered, DO NOT press [Enter] to move to the next field. Press [Tab] or click into the field. Pressing [Enter] is the same as clicking [OK]. |
Initial Surface: Enter the initial surface name, or click [Select Surface] to choose a surface file. For instructions on surface selection, see the Select Surface section below.
Base Elevation: Enter an elevation down to which the stockpile volume will be computed. Generally, this will be the elevation at the base of the stockpile.
Cut Swell Factor: Enter a swell factor to be applied to the cut volume.
Fill Shrink Factor: Enter a shrink factor to be applied to the fill volume.
[OK]: When you have all the parameters set to your satisfaction, click [OK] to actually compute the volume and generate a report.

[Print Report to Text Output Window]: Select this button to print the report results into the Text Output window, and exit this routine.
[Recalculate with new Surface]: Select this button to discard the results and re-start the routine for another calculation.
[Quit Volume Calculations]: Select this button to discard the results and exit this routine.
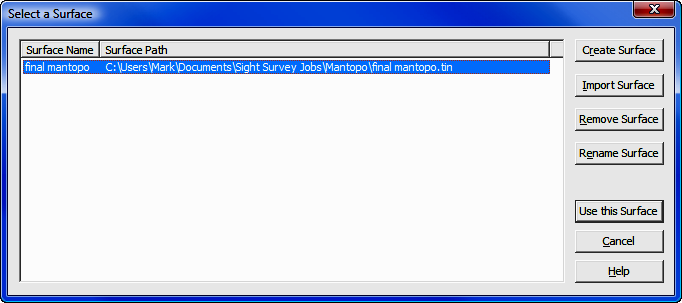
If you are selecting a surface, a dialog box will appear with the available surfaces. You may choose one of the surfaces shown and click [Use this Surface] which will insert the file name into the Surface Name field in the main dialog.

Using this dialog it is also possible to [Create Surface], [Import Surface], [Remove Surface], or [Rename Surface].
[Remove Surface]: Clicking this button removes the highlighted file from the list. The file is not deleted, simply removed from the selection list. To actually delete a surface file, use Windows Explorer (My Computer).
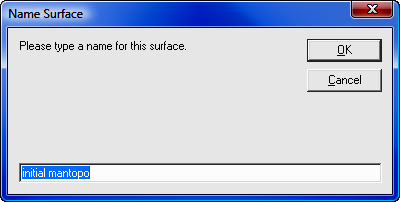
[Rename Surface]: Clicking this button will allow you to rename a surface for ease in identification. Renaming only affects the selection list, not the file itself. In other words, when looking at the Select a Surface dialog box, the Surface Name changes, but the Surface Path (or original file name) does not.

[Create Surface]: This feature is described below.
[Import Surface]: This feature is described following the Create Surface section.
Click [Create Surface] to build a new surface.

Points: Enter the point numbers (or ranges) that will be used to construct the new surface. Click [Select Points] to select points using the Point Manager (PM - Section 6.09).
Name: Enter a name for the surface. This name will appear in the Select a Surface dialog and while it does not have to match the actual surface file name, it will appear along with the Path in the next data entry field.
|
|
HINT: If you intend to change the path, DO NOT press [Enter] after entering the file name. Press [Tab] or click into the Path field. Pressing [Enter] is the same as clicking [Create Surface]. |
Path: By default, the path will set to the folder for the current job, and the actual name of the surface file will default to the Name specified above. If you want the actual file name to be something different, you may edit the Path line. To select a different path, click [Browse]. After entering a path, press [Enter] or click [Create Surface].
[Create Surface]: Click this button to create the surface. The New Surface dialog closes and you are returned to the Select a Surface dialog, where your new surface will appear on the surface selection list. To use the newly created surface, click [Use this Surface].
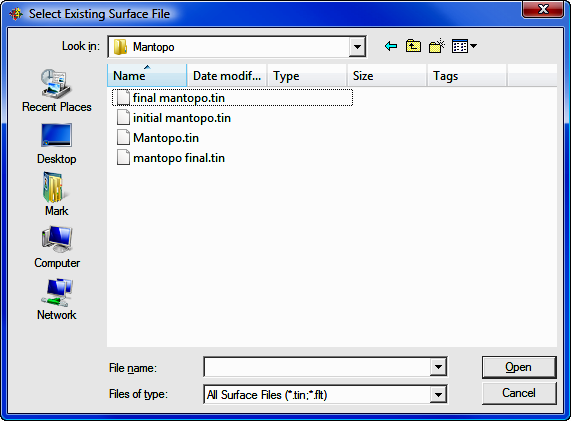
Using a standard Windows file selection dialog, select an existing Surface file to import and click [Open]. The file selection dialog will close and the selected file will be imported to the Select a Surface dialog.

After selecting the file to import, you may give the surface a more descriptive name that will appear on the selection list. Renaming only affects the selection list, not the file itself. In other words, when looking at the Select a Surface dialog box, the Surface Name changes, but the Surface Path (or original file name) does not.