To import a Cloud from a file
right-click the Clouds folder in the Current Project
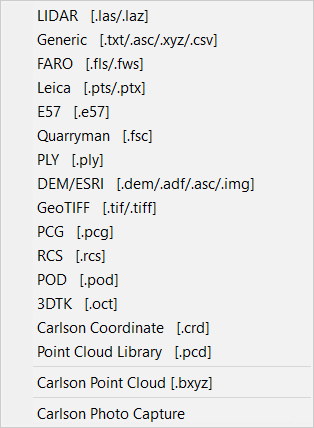
tree and select Import. A list of supported manufacturers
and their formats will be shown. The following table outlines
common formats and their availability within each engine.
Note: the 3DTK engine does not support .pts or .ptx
files.
Quarryman [.fsc] is a new file type that supports data
imported directly from a Carlson Quarryman system.
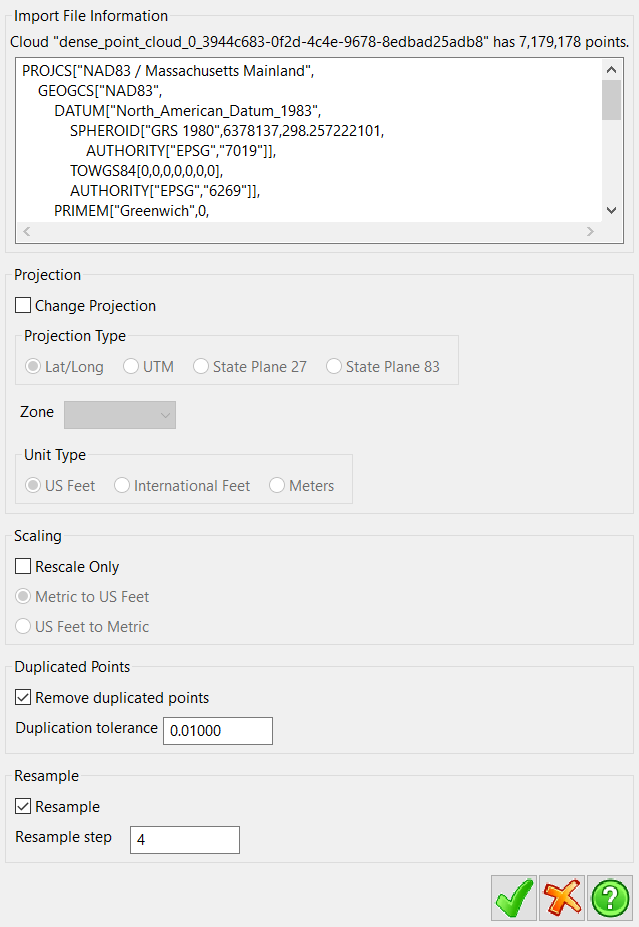
Note the options to clean the cloud on import. This allows users
to remove excess points from the cloud as to reduce the sizeof the
cloud based on a "Re-sample step."
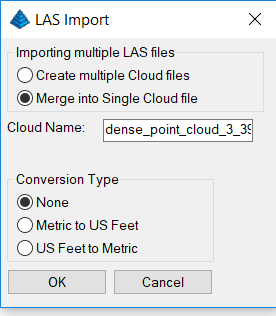
When selecting multiple files, an Import dialog will be
displayed.
This allows users to either keep the imported clouds separate or
to merge the clouds together. If merging two or more cloud files,
provide a name for the merged cloud file. Click OK to
import.
If an ASCII format is selected the Import Cloud dialog will be displayed.
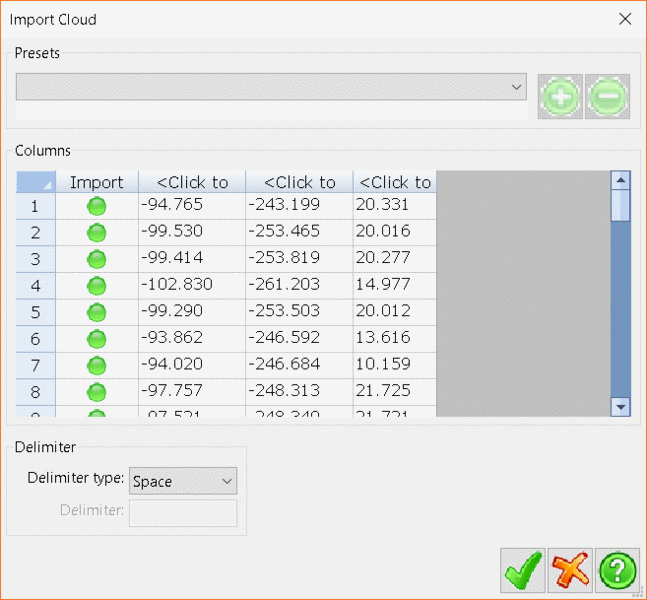
In order for the data to imported correctly the user must define
what delimiter is used within the ASCII file. If the data is not
shown organized in columns (all the data is in one column for
example); another delimiter will need to be chosen. Clicking the
header of each column will bring up a menu with all the possible
values that can be assigned to it, click each column's header to
set its proper value. At the top of the dialog is the
Presets Panel, which allows users to save the
current column assignments to be used in the future. The import
column is used to determine whether to import that particular
column (often files will have text or header information that isn't
actually part of the data set). Save the current configuration by
clicking the + button in the panel, presets can also be removed by
clicking - button. Presets are saved in the global program settings
so they can be used across multiple projects.
Click the Green Tick to begin the import.
After importing a cloud it is advisable to Clean it.
Menu
Location: Right click on
Clouds entry in Project tree
—> Import
Keyboard Command:
None
Prerequisite: Supported cloud
file available, a project open in the Project Tab