Tools Menu:
Surface
11.01 Surface Manager (SM)
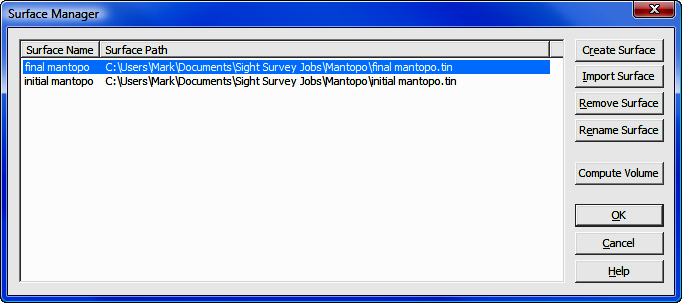
FUNCTION: The Surface Manager
routine is used to create and manage surface (.TIN) files and select those files for use in contouring and volume computations.
Activate the Surface Manager routine by picking from the Tools menu; by pressing [Alt][T], [S], [S]; or by typing the two-letter command SM at any data entry prompt.
When initially called, the Surface Manager will not contain any surface files in the selection list. Populate the list by either creating or importing files. Once the list is populated, these files will appear whenever Surface Manager or a Select Surface dialog box is accessed.
Using this dialog it is also possible to [Create Surface], [Import Surface], [Remove Surface], [Rename Surface], or [Compute Volume].
[Remove Surface]: Clicking this button removes the highlighted file from the list. The file is not deleted, simply removed from the selection list. To actually delete a surface file, use Windows Explorer (My Computer).
[Rename Surface]: Clicking this button will allow you to rename a surface for ease in identification. Renaming only affects the selection list, not the file itself. In other words, when looking at the Select a Surface dialog box, the Surface Name changes, but the Surface Path (or original file name) does not.
[Create Surface]: This feature is described below.
[Import Surface]: This feature is described following the Create Surface section.
[OK]: Accepts any changes and exits this routine.
Click [Create Surface] to build a new surface.
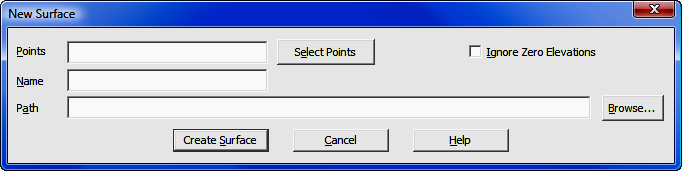
Points: Enter the point numbers (or ranges) that will be used to construct the new surface. Click [Select Points] to select points using the Point Manager (PM - Section 6.09).
Ignore Zero Elevations: Select this option to disregard any points in the selection set that have a zero elevation.
Name: Enter a name for the surface. This name will appear in the Select a Surface dialog and while it does not have to match the actual surface file name, it will appear along with the Path in the next data entry field.
|
|
HINT: If you intend to change the path, DO NOT press [Enter] after entering the file name. Press [Tab] or click into the Path field. Pressing [Enter] is the same as clicking [Create Surface]. |
Path: By default, the path will set to the folder for the current job, and the actual name of the surface file will default to the Name specified above. If you want the actual file name to be something different, you may edit the Path line. To select a different path, click [Browse]. After entering a path, press [Enter] or click [Create Surface].
[Create Surface]: Click this button to create the surface. The New Surface dialog closes and you are returned to the Select a Surface dialog, where your new surface will appear on the surface selection list. To use the newly created surface, click [Use this Surface].
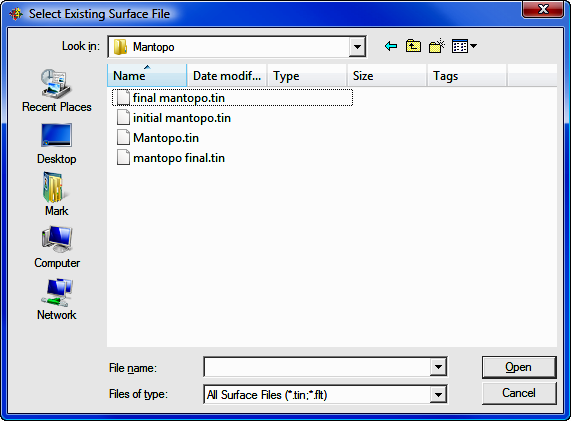
Using a standard Windows file selection dialog, select an existing Surface file to import and click [Open]. The file selection dialog will close and the selected file will be imported to the Select a Surface dialog.
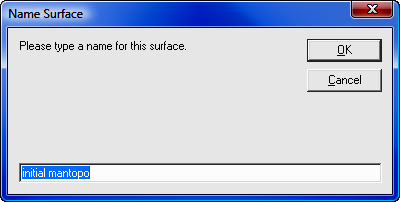
After selecting the file to import, you may give the surface a more descriptive name that will appear on the selection list. Renaming only affects the selection list, not the file itself. In other words, when looking at the Select a Surface dialog box, the Surface Name changes, but the Surface Path (or original file name) does not.
Selecting this option starts the Calculate Volume routine (CV - Section 11.06).