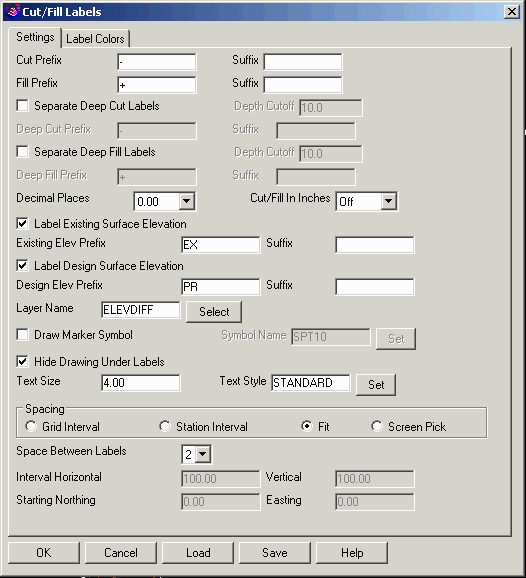
Cut/Fill Labels
This command displays the design elevation, the existing
elevation, and the amount to either cut or fill directly on the
screen. The design and existing elevations can be defined by
triangulation files, grid files or points.
In the Elevation Difference Label Options dialog, you can customize
the Cut/Fill labels. Text can be added either before or after the
Cut/Fill amount, the Existing elevation, and the Design elevation
with the Prefix and Suffix fields. You can also choose whether or
not to display the Existing Surface elevations and the Design
Surface elevations. The Draw Marker Symbol option draws the
specified symbol block at each label point. The Hide Drawing Under
Labels option creates Wipeout entities around the labels so that
you can read the labels clearly. Text Size chooses the text size
for each line of the label. Text Style allows you change the Font
Style displayed in the labels. Decimal Places sets to how many
decimal places the labels will report. The Cut/Fill In Inches
labels in feet and inches to the specified precision. The Separate
Deep Cut/Fill Labels settings allow for highlighting deep areas by
making them a darker color or adding prefix/suffix labels. The
Label Cut and Label Fill toggles allow you to turn off cut or fill
and label only the other.
The Spacing Methods include:
Fit: Uses an inclusion perimeter and the size of the labels to make
a series of rows and columns of labels that fit within the
perimeter. The Space Between Labels sets the buffer around labels.
The size of each space is determined by the Text Size.
Grid Interval: Places the labels at the specified Horizontal and
Vertical Intervals starting with the specified Northing and Easting
coordinate.
Station Interval: Uses a centerline polyline and places the labels
at a station interval along this alignment.
Screen Pick: Prompts for each label position.
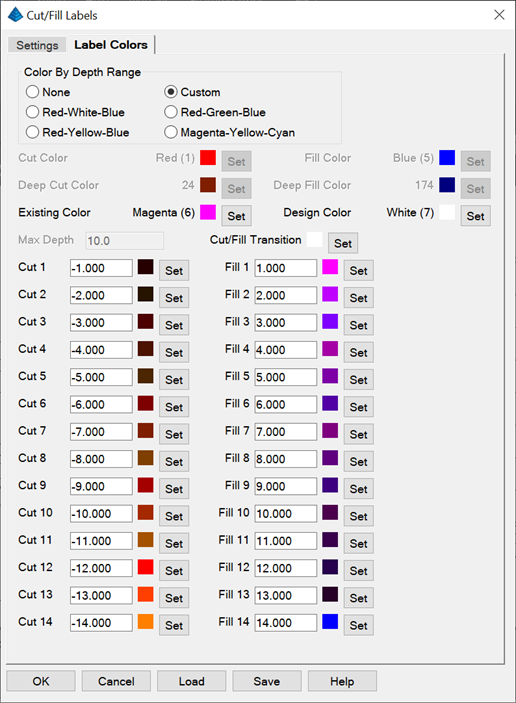
On the Label Colors tab, the Automatic Coloring options choose a
color scheme for the Cut-Daylight-Fill colors. The program will use
a gradient color for the labels depending on the cut/fill value for
the label. The deeper cut/fill values will have a deeper color. The
Max Depth sets the value for the deepest color. You can also choose
None for the Automatic Coloring and then set fixed colors for the
cut and fill. The Custom method lets you specify all the colors and
depth ranges.
The following image shows the main dialog box for setting the
labeling options. The labeling created with these options looks
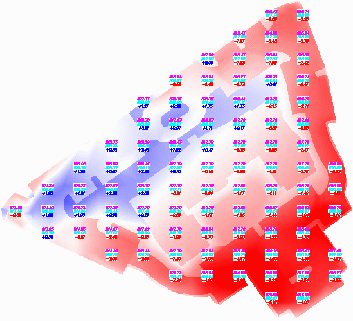
like this: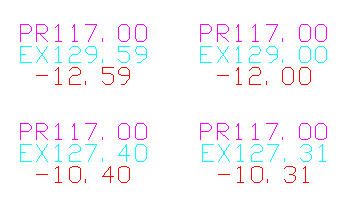 The distribution of the
labels on the site looks like this:
The distribution of the
labels on the site looks like this:
 Pulldown Menu Location:
Surface> Cut/Fill Utilities
Pulldown Menu Location:
Surface> Cut/Fill Utilities
Keyboard Command: elevdiff
Prerequisite: Existing and design surfaces