Scans represent the raw data taken from a scanning device. In addition to the position, intensity, color and normal values found in a Cloud, a Scan also maintains the scanner position, a mapping of scanner pixels to points in the cloud, and a mesh structure that creates each point in the scan with its neighbors. Each Scan is associated with one scanner position, which defines the location of the scanner when the scan was taken.
A scan position encapsulates the entirety of the information needed to match scans taken from a single position with the control points of a project. This data includes any scans taken from that position, the target points associated with that position, any images taken from that position, and the current coordinate system for that scan position.
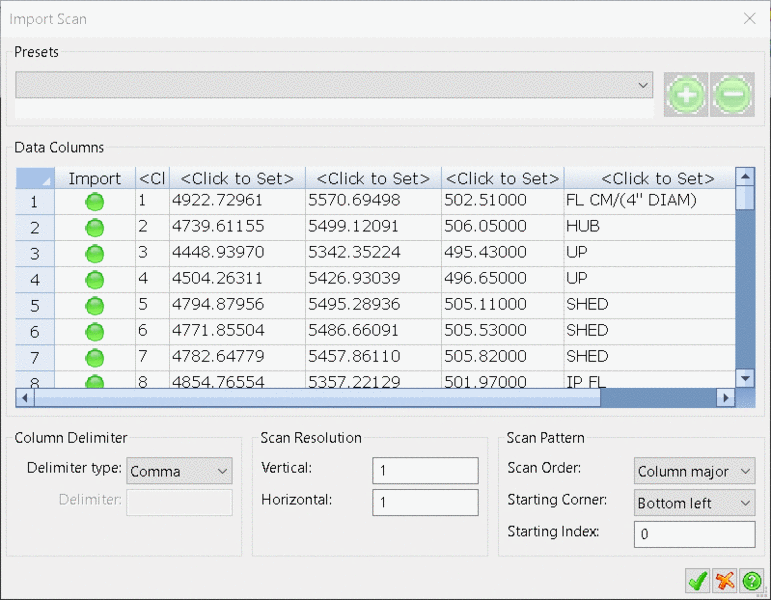
Each of the point engines that are included with Point Cloud
support a variety of formats for importing.
Target points can be manually entered or imported via a similar process to scan importing. To enter the target points in manually, right-click the target points object belonging to the scan position to modify and select Edit. This will bring up the Edit Points dialog for the target points.
The scan registration process begins with pressing the Register button in the toolbar of the Target Points Editor.
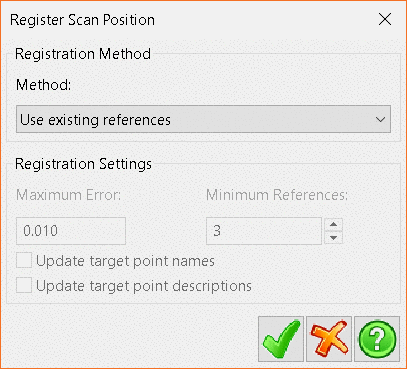
Carlson Point Cloud supports four different methods of scan
registration:
Use existing references will make Point Cloud only use the references that already exist to perform the registration process (these references can be set manually in the Points Editor, or could have been set in a previous registration process).Once satisfied, click the Green Tick. A dialog will display informing the user if the registration was successful. After all scans have been registered, verify the registration visually by viewing the scans together in the same Scene.
Match point names will match target points up with control points with the same name.
Match point description will match target points with control points with the same description.
Minimize position error will attempt to automatically transform the current target points so that they match up with the control points, creating control point-target point pairs. If such a transformation that meets these conditions exists, the target points will have their reference control points set to the control point they were paired with.
Unlike clouds and meshes, Scans can only be created from other
Scans. This is due to extra information required for the indexing
of the cloud data into the scanner's image.
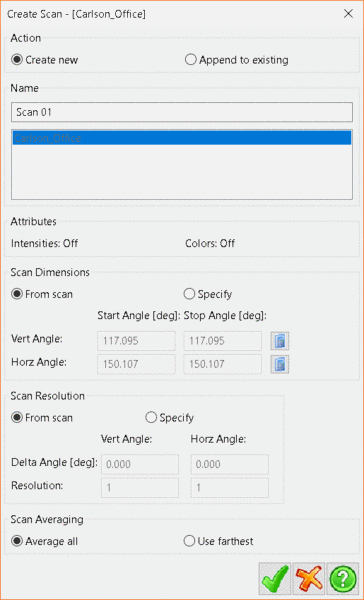
To create a new scan from an existing one, right-mouse click the
source Scan in the Current Project tree and select Create
⇒ Scan. This will display the Create Scan
window.
Note: Typically, the default options give the best
results.
Scan Dimensions determines the height and width (in angles) of
the new scan to create:
From Scan will just the ranges from the original scanScan Resolution determines the data density of the new scan, smaller Delta Angle values will give denser data, while larger resolutions values will do the same.
Specify will allow the user to specify their own custom angles.
From Scan will just the ranges from the original scanThe Scan Averaging determines the action to be taken when it is found that multiple scan points in the source data set fall under the same scan pixel in the new scan data set.
Specify will allow the user to specify their own custom angles
Average All will average all color, position, and intensity values, discarding the original data.Click the Green Tick to create the new scan.
Use Farthest will only use the data point furthest form the scanner and discard all other data points.
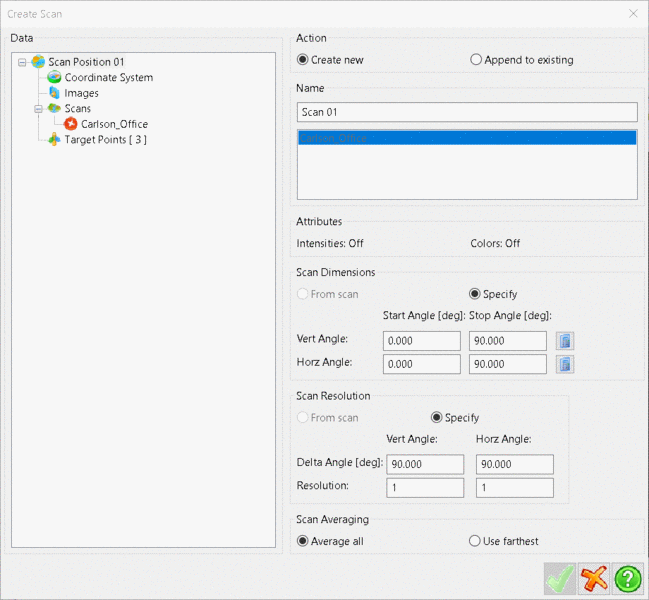
To create a scan from multiple source scans, right-mouse click
on the Scan Position in the Current Project tree and
select Add ⇒ New.
The options on the right side of the Create Scan window have
the same functionality as the single source dialog. The tree
structure on the left side of the dialog allows the user to choose
the source scans to use for data. Clicking the red x next to
a scan will turn it into green circle, signifying to use
that scan as a data source.
Click the Green Tick to create the new scan.
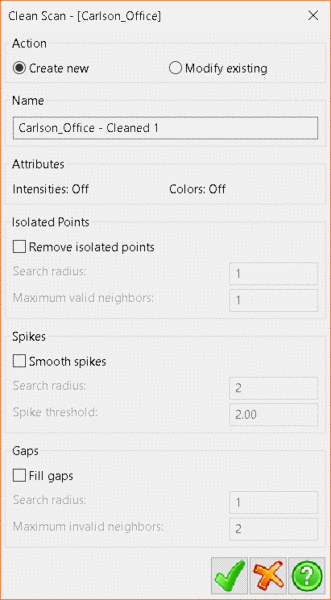
To clean up scanner data to make it more uniform and remove possible outliers, right-mouse click the scan in the Current Project tree and select Clean.
Carlson Point Cloud has three separate methods of cleaning scans:Remove Isolated Points searches all neighbor data points within a square with a side length of Search radius pixels around each pixel in the scanner image for valid data. If less than the maximum amount of valid neighbors specified is found, the point is deleted.Click the Green Tick to clean the scan.
Smooth Spikes reduces spikes in the mesh by finding any points whose distance from the scanner is larger than Spike threshold standard deviations from the average of the pixels in the search radius.
Fill gaps searches each invalid point's neighbor's for the specified amount of invalid neighbors. If less than the specified amount is found, then the invalid reading is changed to a valid reading with a range equal to the average of the neighbor points and color values equal to the average color values.
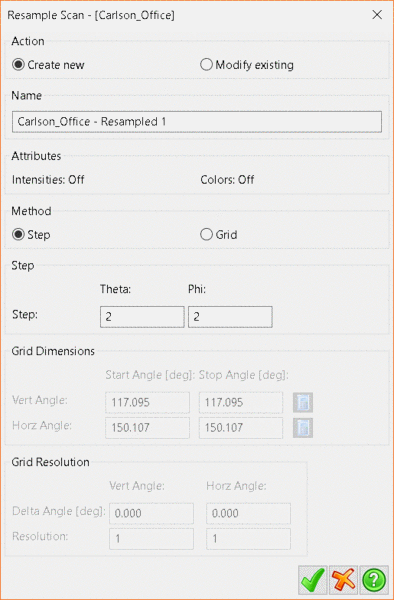
The Step method of resampling steps through the scan using the step values provided for the step size. With a Theta and Phi value of 2 each, the scan will be reduced to 1/4th of its original size.Click the Green Tick to resample the scan.
The Grid method divides the scan up into a grid where each grid block is of the specified size. It then averages the values found inside each block to a new single value for that entire grid block.
Tab Location(s): Project Tab
Prerequisite: Scanner Data