Transforming a Cloud
Any created cloud can be easily transformed by
right-clicking on the cloud and select Transform.
This command will create a new cloud.
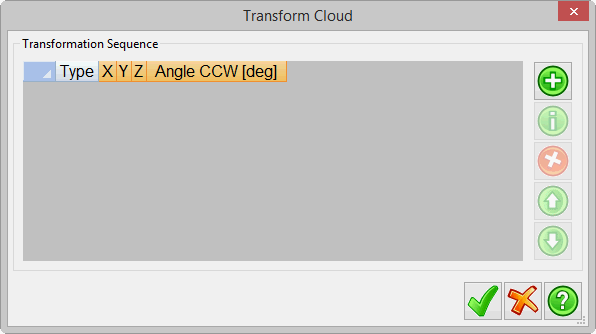
Multiple transformations can be carried out and the sequence of
this can be assigned. To add a transformation, click on the 'plus'
image. This will open up the following dialog:
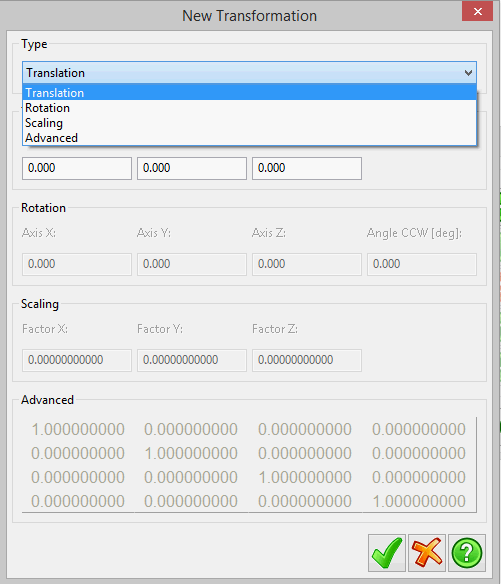
The cloud can be:
- Translated - shifted (positively or negatively) along the X, Y
and/or Z axis
- Rotated - about the X, Y and/or Z axis or CCW (counter
clockwise)
- Scaled - enter in a scale factor to be applied to the X, Y
and/or Z axis
- Advanced - enter in a the values manually
Once the values have been entered in, the sequence can be altered
by selecting a type and moving the value up and down using the up
and down arrows. The values can be amended by selecting a type and
then clicking on the 'i'. To delete a transformation option,
left-click on the type and click on the red X. To accept the
transformation, click on the green tick located at the bottom-left
of the dialog box - this will create a new cloud with the
additional text "Transformed" in the project manager. To cancel the
operation, click on the orange X.