Selecting the Grid button from the Create panel
in the Action Tab will open the Select Grid
Dimensions window. Users can define the desired Grid manually
onscreen, by using the boundary extent of the current scene or by
selecting a Grid file (.grd).
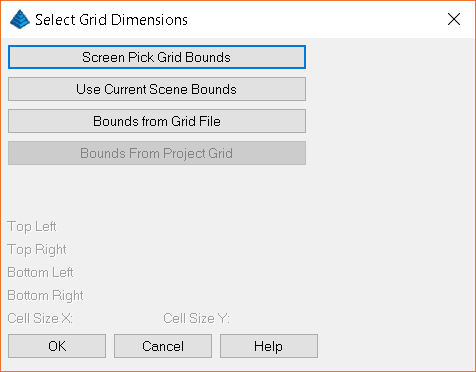
To define the extent of the Grid onscreen, click Screen Pick
Grid Bounds. The Scene will default to a Top-down view. Click
once to pick the first corner, move the mouse to expand the box and
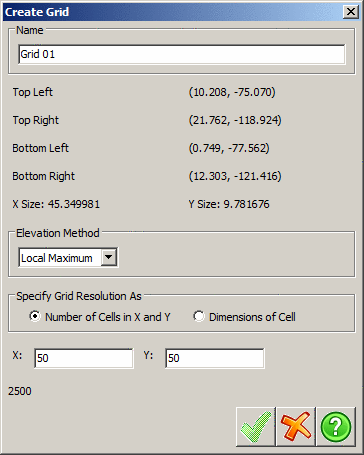
click again to pick the other corner. The Create Grid window
will now be displayed.
The default name of the new grid is controlled through
Settings on the Project
panel.
Statistical information about the selected area will be shown below
the name field. For best results work in Plan view with the X axis
pointing to the right and the Y axis pointing up.
Local Maximum - Uses the maximum elevation within a grid cell as the cell elevation.
Local Minimum - Uses the minimum elevation within a cell as the cell elevation.
Cell Average - Uses the average of the cell elevation as the elevation for the cell.

The grid Resolution may be specified in either the number of cells in the X and Y direction or by the size of each cell. After selecting a method you may adjust the values for X and Y. The total number of cells that will be created is shown below the X and Y values.
Note: If the size of your cell is less than the distance between points in your cloud you will have holes or void areas in your grid. If this occurs you can select the same area and create a grid with larger cell dimensions or a fewer number of cells.
To end the Grid Creation mode click the End Mode button at the top of the Action tab.
Tab Location(s): Action Tab
Panel and Button: Create and Grid
Prerequisite: An open scene of a point cloud