This command inserts an image in the drawing to fit within a
view window. The image is cropped to fit the window. This command
is a way to handle an image with a different aspect ratio then the
window area for a report. The image is sized to fill the whole
window area. For example, you can use the screen shot function in
the 3D Viewer Window to make an image of your surface model and
then use this command to fit this image onto a report.
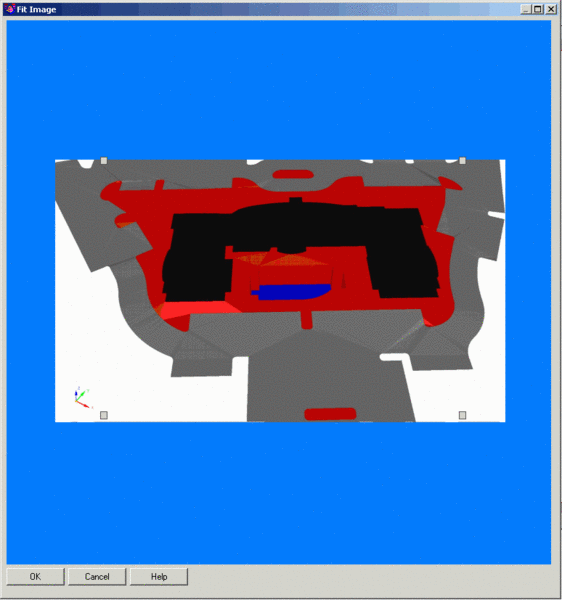
After selecting the image file, the program prompts to pick the
corners of the window for the image in the drawing. Then the dialog
shows the image and four white boxes for the corner points for
cropping. Click and drag the corner points to move and resize these
corner points. When you click in the middle, all the corners move
together. When you click near a corner that corner point can be
moved in or out to resize.
The program creates a new image file for the adjusted image.
This file is named after the original file name with "_fit" added.
The original image file is not changed.
Select Image File
Pick 1st corner for
image: pick a point
Pick other corner for image: pick a point
Fit Image dialog
Pulldown Menu Location: Takeoff > Graphic Reports
Keyboard Command:
image_layout
Prerequisite: Image file