Closure by Point Numbers
This command allows for traverse entry by point numbers, reports
the closure and supports traverse adjustments. Using an existing
coordinate file, the traverse is defined by a series of point
numbers. The angle and distance for each traverse segment is
calculated using the coordinates of the points. The traverse can be
processed using all adjustment routines. Refer to the
Edit-Process Raw Data File command for more detail on
adjustment procedures. After selecting Closure By Point
Numbers from the Survey menu, the Closure By Point Numbers
dialog will appear.


In this dialog shown above, add the
point numbers that make up the traverse. This can be done by
entering the point number, a range of points, or a point group into
the Point Number(s) field. You can also choose points from a list
by clicking the List button. Once each point, or group of points,
is entered, click the Add button. Continue in this fashion until
all of the point numbers are entered in. Clicking the Process
button will display the Choose Process Method dialog. Choose the
desired process method.

After selecting the process method for any of the adjustment
methods, the dialogs and prompts will follow. They all start out
with an "options" dialog box. These dialogs are titled either
Process Options or Closure Options, depending on which process
method you chose. The prompts that follow for any of the methods
are subset of, and are very similar to, the prompting found in the
Edit-Process Raw Data File command. After you have made your
selections within these dialog boxes, click OK.
|
|
| When
you choose No Adjust of Angle Balance |
|
|
| When
you choose Transit, Compass or Crandall |
Each of the process methods will display a report that details the
closure before the adjustment, and after the adjustment. Options to
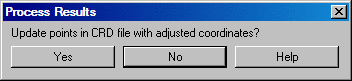
save and print this report are available. After a review of the
report, pressing Exit will remove the report from the screen. At
this point a Process Results dialog, prompting whether to Update
points in CRD file with adjusted coordinates, will appear. If you
choose Yes, the active coordinate (.CRD) file will be updated with
the adjusted coordinates. Choosing No will leave the active
coordinate (.CRD) file in its existing state, with the coordinates
unchanged. It is important to remember that the starting and ending
point in this routine must be a different point number. For
example, if the traverse starts at point 1 and ends at point 1,
then another point number should be used for the tie in shot to
point 1. This logic is different in Edit-Process Raw Data
File, where the starting and ending point can be the same point
number.
Pulldown Menu Location: Survey
Keyboard Command: ptrawedit
Prerequisite: Coordinate (.CRD) file