Solar Observations
This feature calculates true north and/or grid north bearings by
solar observation. It uses the Local Hour Angle (LHA) method. The
routine calculates Ephemeris data, thus alleviating the necessity
of obtaining a Solar Ephemeris. The True North option calculates
the true north bearing to mark. This option requires no
zone/ellipsoid information. The True North & Grid North option
calculates both true north and grid north bearings to north. The
convergence angle is also shown.
Note: There is a
description of solar observation field procedures at the end of
this section.
True North Prompts
Calculate true north, or true north and grid bearing
(<True north>/Grid Bearing: type T, press Enter
Choose field method (Leading edge/Trailing
edge/<Center>): choose
method, press Enter
If a Roelofs prism is being used, the Center Method should be
selected. If not, select one of the other options. The Trailing
Edge Method is the more popular of the two remaining
methods.
Date of observation as MM/DD/YY or MM-DD-YYYY: For example
04/08/03.
Enter latitude of instrument point as DD.MMSS: For example
36.0545
Enter longitude of instrument point as DD.MMSS:
The following input loop will begin:
Obs. #1 - Time of observation as HH.MMSS: For example
15.3030
Enter angle to mark as DD.MMSS: Angle in the instrument when
backsighting the mark.
Enter angle to sun as DD.MMSS: Clockwise angle from mark to
sun.
The angle to the mark always has a default value of the last
entered Angle to Mark. Each observation is numbered and the true
bearing to the mark will be calculated. There is not limit as to
the number of observations that can be made from a setup. After
data entry is complete, press Enter.
The following options appear:
[Edit/Ok/Quit]
<O>:
If you choose Edit, you will have the following options:
ADD/Change/Delete/eXit:
Add: Allows for addition observation
data entry.
Change:
Allows editing of existing data.
When selected a prompt for Enter observation to change will be
displayed. Choose which observation number to edit. You will then
be prompted with the initial input prompts for the observation
again. The original input values will be the default values for
each prompt. To change the value, simply enter new data.
Once Delete: This will
delete the specified observation data. Choose the observation
number to delete.
eXit: This exits the change
routine.
If you type 0 and Enter or just enter for OK, the bearings from all the
observations will be averaged and shown as well as the True
Bearing. For example:
No.
Time
Angle-@-Mark Angle-to-Sun
True-Brg-to-Mark
1
12.3030
0°00'00"
20°00'00"
N
73°05'43"E
2
12.4456
0°00'00"
21°00'00"
N
74°17'15"E
Average True Bearing: N 73°41'29"E
True North & Grid Bearing Prompts
Type of calculation
[True-north/true-north-and-Grid-bearing] <T>:
G
The following dialog will be displayed.
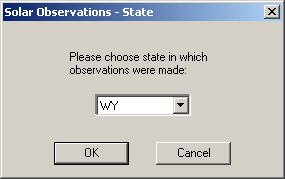
Select the state in which the observations were made. All fifty
states are available, as well as PR for Puerto Rico and UTM for
Universal Transverse Mercator.
If the state is divided into zones, you will be prompted for the
zone you are working in.
Enter zone (N,S): Enter
the zone.
If you are using a UTM , you will see the following
prompt:
Enter ellipsoid to use [GRS-1980/Other]
<G>:
Type "R" and Enter or just Enter
for Reciprocal flattening, "S" and Enter for Semi-minor axis, or
"E" and Enter for ellipsoid ECC squared.
if you typed O and Enter for
Other, you will see the
following prompt:
Ellipsoid constant [Reciprocal
flattening/Semi-minor axis/ellipsoid ECC squared]
<R>:
Depending on what was entered at the last prompt you will see one
of the following prompts:
Enter reciprocal flattening constant:
Type the constant.
Enter semi-minor axis:
Enter the axis.
Enter ellipsoid ECC squared
constant: Enter the constant.
After entering the zone and ellipsoid information (if
applicable) the date, latitude, longitude and time input loop will
begin (as described above for the True North calculation).
After data entry is completed the [Edit/Ok/Quit] <O>: prompt will
be displayed (see the True North section for more details on this
prompt).
If you type 0 and Enter of just Enter for Ok, the information for
all the observations is displayed along with the Average True
Bearing, Average Grid Bearing and the Convergence Angle as
follows:
No.
Time
Angle-@-Mark Angle-to-Sun
True-Brg-to-Mark
1
12.2222
0°00'00"
20°00'00" N
72°57'31"E
2
12.4444
0°00'00"
22°00'00" N
74°20'51"E
Average True Bearing: N
73°39'11"E
Average Grid Bearing: N
72°15'12"E
Convergency Angle:
1°23'59"
Field Procedures for the Local Hour Angle (LHA) method
This section explains Universal Time and then explains two ways of
pointing, Trailing Edge Tangency and Roelofs Prism.
Universal Time
The Universal Time can be obtained on certain radio bands. On the
radio channel there will be a signal beep every minute. Set a watch
to the Universal Time or, when in the field, start a stopwatch at
the beep (for a known Universal Time).
In order for the solar observation method to produce accurate
results, it is essential that you record the precise Universal Time
for an observation. Thus, when making the field observations,
record the stopwatch elapsed time in order to calculate the
Universal Time or, if you set your watch to Universal Time, record
the time directly.
Trailing Edge Tangency
While pointing at the ground mark, set the horizontal circle to
read about 00-00-30, perfect pointing. With the scope direct,
record the horizontal circle reading to the mark.
Attach the eyepiece filter and sight the sun. After locating the
sun, do the following:
Set the horizontal reticle line near the center of the sun’s image
with the vertical reticle line leading the trailing edge of the sun
(slightly right for a direct image).
Clamp the horizontal motion and watch the image of the sun as the
trailing edge approaches tangency with the vertical reticle
line.
Stop the timer at the time of tangency.
Record the time and the horizontal circle reading.
Repeat the pointing for a total of four pointings in the direct
position.
Unclamp the horizontal motion, rotate the instrument 180 degrees,
plunge the scope, and then obtain data for four reverse
readings.
Unclamp the horizontal motion, point at the ground mark with the
instrument reverse and record the horizontal circle.
The timer must be checked-in on a radio signal. Some quartz
regulated electronic watches are accurate for extended periods of
time, allowing several hours of check-in to check-out on the radio.
Otherwise, most timers should be started and stopped on a radio
signal at the beginning and ending of the observation set.
Roelofs Prism
Attach Roelofs prism and sight the sun (you can center the shadow
of the telescope between the standards as an aid in locating the
sun). Be sure that the hinged tube is closed when pointing at the
sun. After locating the sun through the scope, do the
following:
Rotate the prism until the four overlapping
images of the sun are symmetrical with the instrument’s reticle
lines.
Point on the ground mark with the instrument
direct and the Roelofs prism tube swung open, perfect pointing on
the ground mark. Record the horizontal circle reading to the
mark.
Point at the sun with the prism closed. After
locating the sun, do the following:
Set the horizontal reticle line near the center of the sun’s
pattern with the vertical reticle line leading the center of
the moving pattern (slightly to right of the sun for direct
optics).
Clamp the horizontal motion and watch the pattern move to the point
of coincidence. This is the intersection of the vertical reticle
line with the apex of the small dark square formed in the center of
the pattern by the overlapping parts of the four images formed of
the sun.
Stop the timer at the moment of coincidence.
Record the time and the horizontal circle reading.
Repeat the pointing for a total of four readings in the direct
position.
Unclamp the horizontal motion, rotate the instrument 180 degrees,
plunge the scope, and then obtain data for four reverse
readings.
Unclamp the horizontal motion, point on the ground mark with the
instrument reversed and record the angle on the horizontal
circle.
The timer must be checked-in on a radio signal. Some quartz
regulated electronic watches are accurate for extended periods of
time, allowing several hours of check-in to check-out on the radio.
Otherwise, most timers should be started and stopped on a radio
signal at the beginning and ending of the observation set.
Pulldown Menu Location: COGO
Keyboard Command: cg_solar_obs
Prerequisite: None