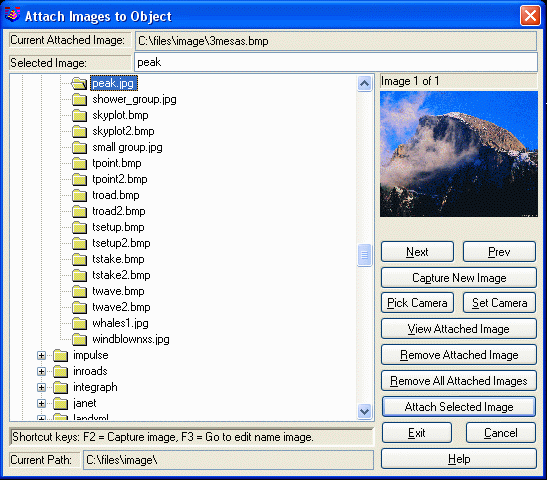
Multiple images or documents can be attached to the entity by
picking Attach Selected Image/Doc or Capture New Image multiple
times. To cycle the images in the preview, use the Next and Prev
buttons. Use the Remove Attached Image to remove the image shown in
the preview. Use Remove All Attached Images to clear all images
from the entity.
The View Attached Image/Doc button will display in the preview window any image already attached to the entity instead of the selected image file. Also any image already attached to the selected entity is displayed in the Current Image field at the top of the dialog when nothing is selected in the file list.
Select object to attach symbol to: pick an
entity
Attach Image to Object Dialog
Done.
Select object to attach symbol to: press Enter
Pulldown Menu Location: Images
Keyboard Command: set_image
Prerequisite: A drawing entity and an image or document
file