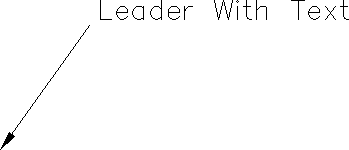
Options/Size/Pick Arrow Location: pick a point
Text location: pick a point
Text: Leader With Text
Text: press Enter
This command will draw a straight leader between two points,
with an arrow at one end and optional text at the other. The
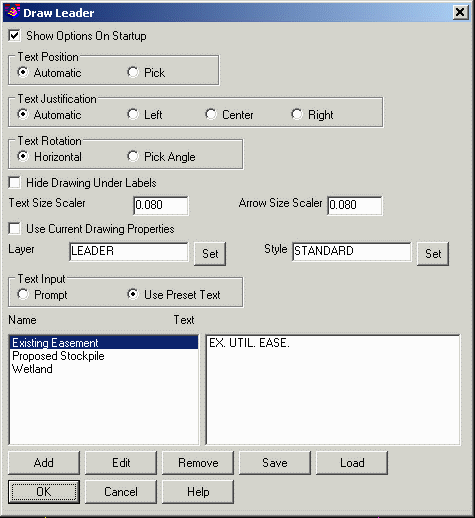
options dialog is displayed at the start. To skip this dialog, turn
off the Show Options On Startup toggle. Then on the command line,
entering O for Options
will show the options dialog. To quickly change the label size,
enter S for Size at the command line.
In the options dialog, Text Position chooses between
automatically placing the label next to the leader end point or
picking the label position. For Text Justification, you can set a
specific justification or use the Automatic option which uses
either Left or Right justification depending on whether the leader
end is left or right of the leader start. Text Rotation chooses
between having the label horizontal to the current view, prompting
for the label angle or at a fixed angle specified in the dialog.
The Hide Drawing Under Labels option uses a wipeout to hide drawing
entities behind the leader labels. There are settings for the layer
and style for the label. The Use MText option chooses between
creates MText or regular Text entities. The Leader Horizontal Tick
option draws a short horizontal line segment at the end of the
leader.
The Text Input can either be entered with prompts after the
leader points at the command line or selected from a prepared list.
The prepared list is a way to quickly create leaders for common
labels. To prepare the label list, use the Add, Edit and Remove
buttons. Use the Save and Load buttons to save the preset labels to
a .CALL file.
Options/Size/Pick Arrow Location: pick a point
Text location: pick a point
Text: Leader With Text
Text: press Enter
Pulldown Menu Location: Draw > Leader
Keyboard Command: LDR
Prerequisite: None