Digitize Rectangle
This command enables you to quickly create rectangles while
digitizing. In the dialog, you can pick to set elevations to the
rectangles, otherwise all rectangles will have 0.0 elevation. The
Elevation Adder will be added to the value you enter in for the
prompt "Enter polyline elevation <0.00>:". For example, if
you know all the rectangles you are creating are in the 200s for
elevation, you can put in this value for the Elevation Adder and
simply put 46, 54, 57, etc. when prompted, and your rectangles will
end up with the elevations of 246, 254, 257 etc. There are three
ways to enter a layer name, Use current drawing layer, Select from
a list of layer name, or Pick an entity on the screen to get its
layer name. Auto-Zoom mode would automatically zoom the display to
center around the last point when you get near the edge of the
screen while picking points. 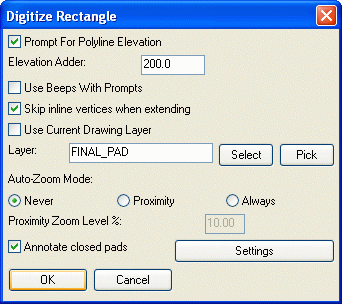 Annotate closed pads will label your
rectangles according to the Settings button/dialog shown
below:
Annotate closed pads will label your
rectangles according to the Settings button/dialog shown
below: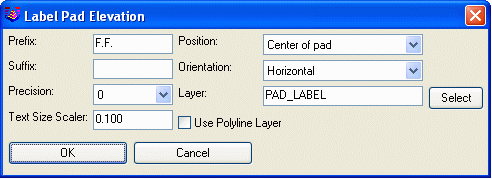 In this dialog, you can enter in a
Prefix or a Suffix to the elevation, and determine the labels
position, orientation, precision out to 5 decimal places, its
layer, and text size.
In this dialog, you can enter in a
Prefix or a Suffix to the elevation, and determine the labels
position, orientation, precision out to 5 decimal places, its
layer, and text size.
Prompts
Target surface: Design
Digitize Rectangle Dialog
Make any chances you desire in the above dialogs.
Enter polyline elevation
<0.00>: 200
First point: pick a point on the drawing using
puck
Segment length: 0.00, Total
length: 0.00
Close[A]/Undo[B]/Osnap[.]/Pick
next point: pick next
point
Segment length: 1105.96, Total
length: 1105.96
Close[A]/Undo[B]/Osnap[.]/Pick
next point: pick next
point
Segment length: 426.83, Total
length: 1532.79, Area: 236021.59
Close[A]/Undo[B]/Osnap[.]/Pick
next point (Enter to end): After 3 points you can press (A) for Close to
create a rectangle
Digitize Another FINAL_PAD
Polyline [Yes(A)/<No(B)>]? B for No
Prerequisite: a digitizer
Keyboard Command: DIG_RECT