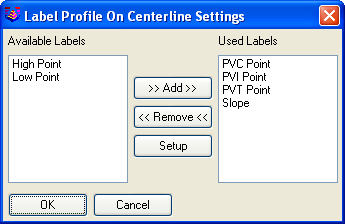
This command labels a road profile on a centerline in the plan
view. First you are asked to select a road profile and a
centerline. Then on the Label Profile On Centerline Settings
dialog, you need to choose which labels to draw. The left list
shows the available labels to draw, the right list shows the label
that have been chosen to draw. Add button moves the highlighted label
on the left list to the right list, Remove button moves the highlighted
label on the right list to the left list, and Setup button allows you to edit the
options of how to display the highlighted label in the plan
view.
The available labels include:
PVC, PVI, PVT, High and Low Points: To label the station and/or
elevation of the profile at these points.
Slope: To label each different slope in the profile.
Station At Interval: To label the stations along the centerline at
a station interval.
Elevation At Interval: To label the profile elevations at a station
interval.
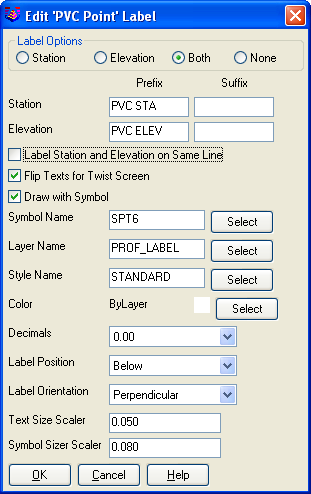
On the point label edit dialog, you may choose to display either
the station or elevation, or both, or neither of them, and specify
their prefix or suffix. If you choose to label both the station and
the elevation, the labels are drawn in two lines by default, unless
you elect the option to Label
Station and Elevation on Same Line. When the screen is
twisted, some of the labels would possibly be drawn upside down,
the Flip Texts for Twist
Screen option flips the text to the proper direction.
Draw with Symbol setting
draws a symbol at the position of the label. Next, you would select
from a list the Symbol
Name, Layer Name,
Style Name and Color for displaying the label. The
Label Position can be set
to Above or Below the centerline or to the
Left or Right of the centerline. There are three
Label Orientation settings:
Horizontal, Parallel and Perpendicular.
Text Size Scaler and
Symbol Size Scaler
determine the size of the text label and symbol label respectively
in plan view.
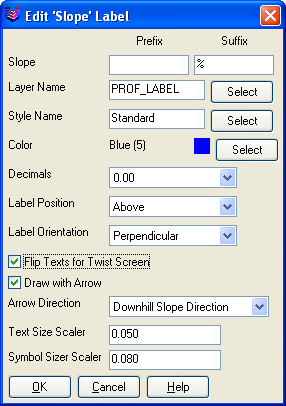
The slope label edit dialog is very similar to the point label
edit dialog, the big difference is the Arrow Direction. There are four arrow
directions: Centerline
Direction, Uphill Slope
Direction, Downhill Slope
Direction and Away from
PVI.
|
|
| Label
profile On Centerline Settings Dialog |
|
|
| An example dialog for editing PVC
Point Label |
|
|
| An example dialog for editing
Slope Label |
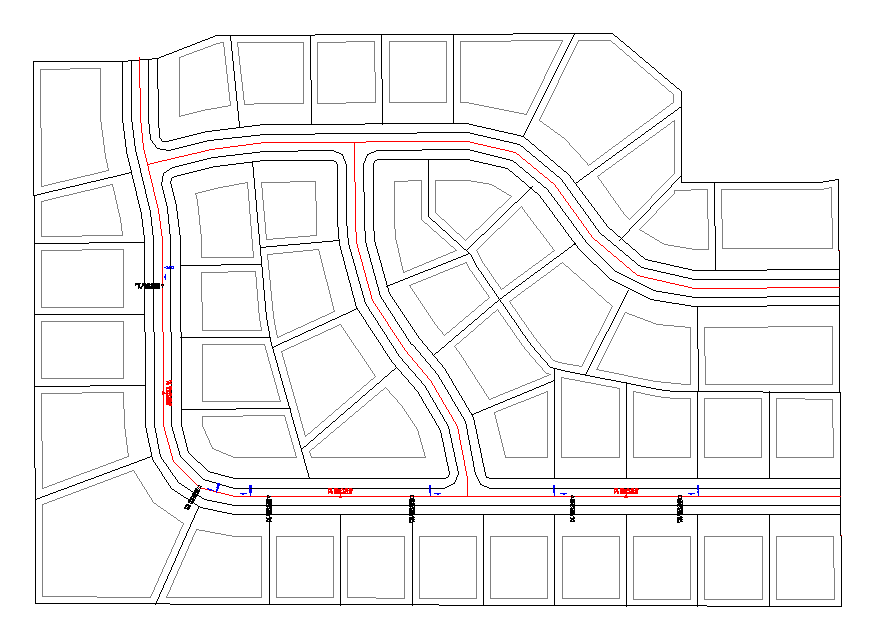
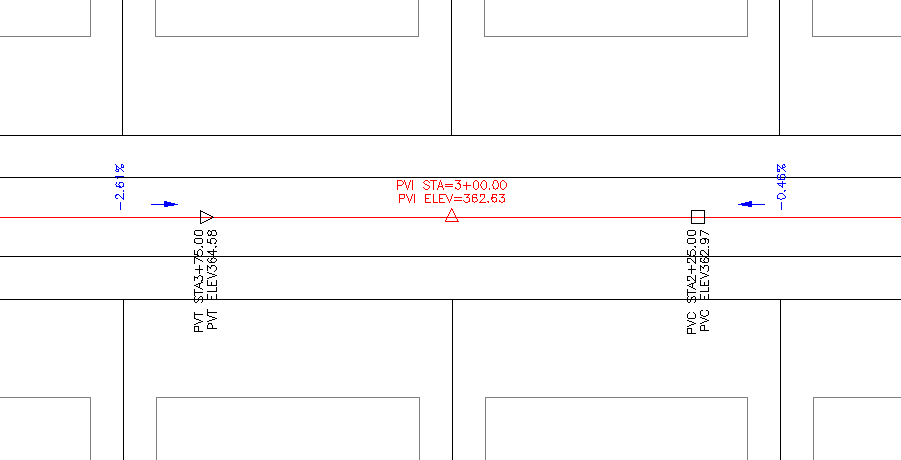
Here's a site design example shown below, where a profile is
labeled on the centerline. The PVI labels are above and parallel to
the centerline, the PVC and PVT labels are below and perpendicular
to the centerline, and the slopes are above and perpendicular to
the centerline, their arrows are in the downhill slope
direction.
|
| Site Design Example |
|
| A closer look of profile
labels |

|
| Edit
PVI Dialog |

|
| Through Point Dialog |