The Camera Tab is the third tab in the Project Manager and has several functions that govern the current scene's camera behavior and positioning as well as functions that allow access to some camera presets. The Camera Tab will only be active if there is a currently open scene, otherwise all of its controls will be ghosted out.

The Left Motion, Middle Motion, and Right Motion panels control the behavior of the left, middle and right mouse buttons, respectively.

Cube Orbit rotates the camera around the center of the scene's bounding box, the default behavior for the left mouse button.
Orbit will orbit the camera around the pivot, and the pivot's behavior can be defined in the Pivot panel.
Pan pans the camera, moving the camera laterally or vertically from its perspective, the default behavior for the middle mouse button.
Swivel rotates the camera view direction around its current position.
Zoom will zoom the camera, moving the mouse up will zoom in, moving the mouse down will zoom out. This is the default behavior for the right mouse button.
The Zoom panel has some buttons that relate to the camera's zoom levels.

Window will allow the user to draw a window in the current top-level viewer in which the zoom level will be adjusted to fit that window.
Extents will move the camera out from the scene so that the entire scene fits in the current view given its view direction and projection settings.
Reset will reset the camera to the default seen upon initial loading of the scene.
The Current Camera panel has options for manually modifying each of the camera's position and view direction properties. Each option features a target button which, when pressed, will allow you to ctrl click into the scene to set that property to a value from the scene. The preset views for the Camera are accessed by clicking the icons along the top of the panel. From left to right they are; Top, Bottom, Front, Back, Left, Right and Scanner location.

Eye is the position of the current camera.
Target is the current facing direction of the camera.
Up is the current camera's up vector.
Normal is the 90 degree vector to the current view plane.
The Pivot Panel determines the behavior of the pivot point when in Orbit mode.

Automatic, the default behavior, moves the pivot to the valid data nearest to the cursor whenever orbit mode is activated.
Center will move the pivot point to the center of the scene's bounding box.
Custom will enable the Position controls and allow entry of the Pivot point manually (or via a ctrl-click in the scene if you press the green target button).
Origin will move the pivot point to the origin of the scene's coordinate system.
Target will place the pivot point at the nearest valid data to the center camera's view.
The Projection panel determines the projection mode of the current camera.

Orthographic projection mode will not apply perspective distortion (to simulate the effect of a real-world camera lense) and the View Height option will determine the height of the view (in world units).
Perspective projection mode will apply a perspective distortion, and the Field of View option determines the vertical viewing angle of the cone that defines the camera's visibility.
The Clipping options allow the user to manually set up of the view's clipping planes. Clipping planes will cut out any objects closer than the front clip plane and any objects further than the back plane. In some cases, it may be useful to manually manipulate the clip planes. By default custom clip planes are disabled.

Center will treat the front and back plane distances as distances from the center of the scene, so the front clip plane is placed Front units away from the center in the direction of the camera and the back clip plane is placed Back units away from the center in the direction opposite of the camera.
Eye will treat the front and back plane distance as distances from the current camera's position, in this mode, Front should be larger than Back or nothing will be drawn on screen.
Origin will treat the front and back plane distances as distances from the scene's origin, typically this option is only used when working with a scan whose coordinate system places the scan at the origin.
Pivot will treat the front and back plane distances as distances from the current pivot point.
Target will treat the front and back plane distances as distances from the valid point nearest to the center of the screen.
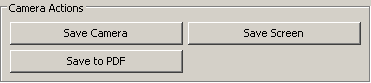
Additionally, there is an option to save the current camera settings to the current scene (which can later be accessed through the scene page) using the Save Camera button and an option to save an image of the current contents of the viewer using Save Screen, which will bring up a save file dialog. Pressing Save Screen will bring up the standard Carlson save file dialog and you can choose where to save the image as BMP file. The final option is to Save to PDF. Pressing the Save to PDF button opens the PDF options. The user can choose size of image, Border and title block fields to be included in the PDF file. The current view in the scene is written to the PDF.
Tab Location(s): Camera Tab
Prerequisite: Open Scene