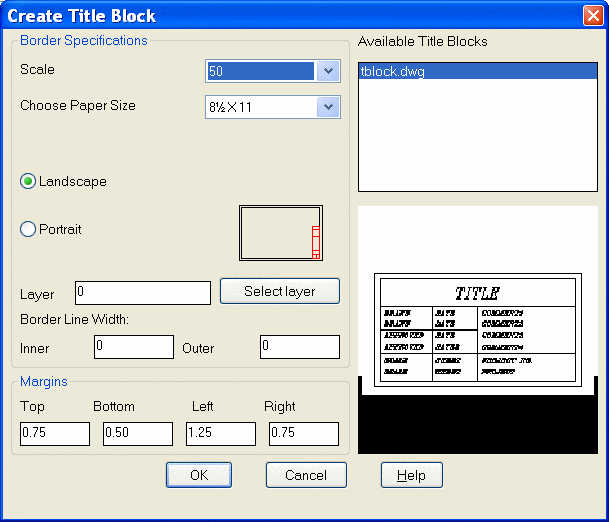
This command draws a border and title block for the selected
sheet size. At the top of the dialog, choose your horizontal scale
and sheet size. The *other* choice at the bottom of each list will
allow you to add your own scale or size if yours is not listed.
Anything added to these lists will be retained for future use.
Next, choose either "landscape" or "portrait" format. A blue
rectangle next to this choice shows you the difference. Below this,
you can choose what layer to draw the border and title block on.
The margins to use are specified next at the bottom of the dialog.
On the right hand side of the dialog. you can choose from several
title blocks. As you choose each one, a preview will be shown below
this list. This routine looks for all drawings named "tblock" in
the \SUP directory. If you want to add your own title block, simply
create a new drawing (or copy an existing one) in the \SUP
directory and give it a name that starts with tblock. Example:
tblock22.dwg and tblock-Jones.dwg are both valid names for this
routine, but "MyTitleblk.dwg" is not. After you have made all your
decisions in the dialog box, press OK. Depending on your current
zoom level, your drawing may be zoomed out to allow you to see the
entire area that will be covered by the drawing border. At this
point, you have the border attached to your cursor and it is
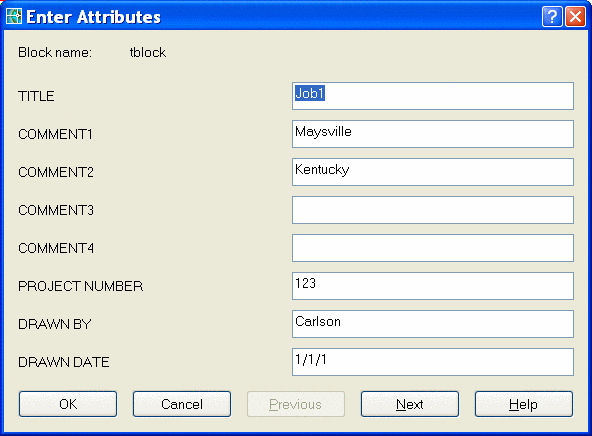
waiting for you to pick a point for insertion. As soon as you do
this, a secondary dialog will appear for you to fill out the
attributes associated with the particular title block you
selected.

Pulldown Menu Location: Settings
Keyboard Command: tblock
Prerequisite: Set horizontal scale in Drawing Setup